ad tag

728x90

December 26, 2010

Fried Hokkien Mee

Invited to another foodie's house for Boxing Day dinner... what should I cook? (especially when this person wants to learn about Chinese stir fry??) Hmmm..

After a few days of Christmas food, we were hankering for some good old Singapore flavours. Garlicky, savoury.. full of umami...

Rummaging in our pantry we found a packet of thick yellow (Hokkien) noodles and dried rice vermicelli. Fried "Hokkien Mee" then! ("Mee" is Hokkien for noodles). This dish, consisting of thick fresh noodles and rice vermicelli, cooked with prawns, squid, pork in a rich prawn stock, is a firm favourite, appearing in every hawker centre.

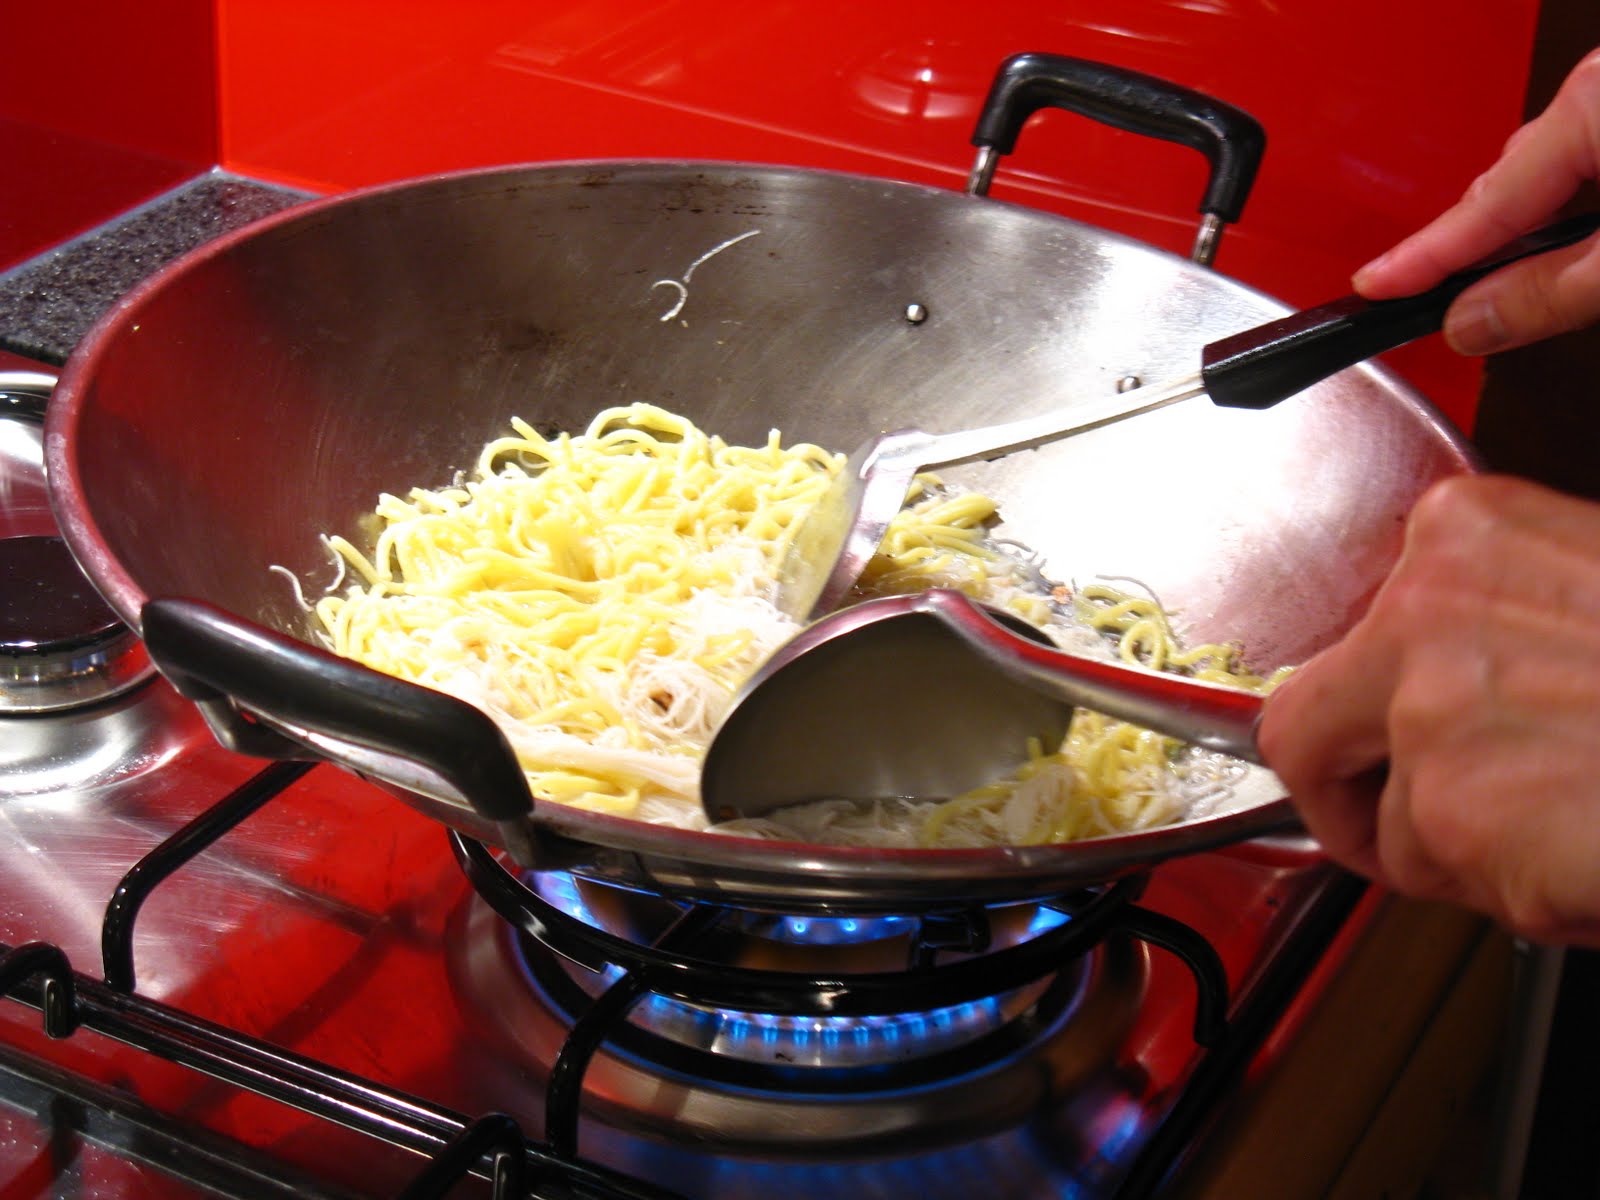
stir-frying mee in a wok
Braved the pre-Christmas crush at the supermarket on the 24th and found a packet of frozen prawns, raw, with shell on. Wanted fresh actually, but then that would be nigh impossible. Do you know how difficult it is to find fresh prawns here? Blood from stone! We had to scour the freezer chests of 2 supermarkets just to find the type of prawn we wanted. Most supermarkets here sell frozen prawn cutlets, either cooked or raw without the shell or head. Just what are prawn cutlets? Why not just call them prawns? Anyway, I digress. Another key ingredient, belly pork was not too hard to find, still plenty left on the shelves, not really a Christmas food. Frozen squid tubes substitute quite nicely for fresh calamari.

mung bean sprouts or "tau geh"

Don't be daunted by the long list of ingredients. It's really quite an easy dish to make, the preparation is not too tedious and one is well rewarded by the results.

blanched squid, prawn and pork

Ingredients:
  • 200g fresh thick yellow (Hokkien) noodles
  • 100g dried rice vermicelli
  • 150g raw prawns, peeled and deveined, head and shells reserved
  • 150g squid tubes
  • 200g belly pork (2 strips about 2-3cm thick)
  • 4-6 cloves garlic, finely chopped
  • 3 cups bean sprouts, cleaned
  • 2 eggs, lightly beaten
  • spring onions / scallions finely sliced
  • red chilli, de-seeded and finely sliced
  • salt
  • white pepper
  • dark soy sauce 1 tablespoon
  • light soy sauce 1 tablespoon
  • 4 small limes (limaukasturi)

Method:
  1. Prepare the prawn stock - a good stock makes the difference between an absolutely delicious plate of noodles and a "just so-so" one.
  2. Heat a table spoon of cooking oil in a large pot and stir fry 2 cloves of garlic over medium heat for a few minutes until just starting to soften. Add the prawn heads and shells and fry till they turn pink and smell fragrant. Add the 2 soy sauces, allow for caramelisation and the add 1 litre of boiling water. Simmer for 10-15minutes.
  3. Strain into another clean sauce pan. Use a potato masher to extract as much from the shells as possible. Season with salt and pepper. (The stock has to be salty enough to flavour the noodles, as no more salt will be added during the frying of the noodles)

Preparing the meat/seafood:
  1. Cook the prawns and squid separately in the stock, remove and cool.
  2. Slice the prawns into 2 (or keep them whole if you feel generous or have plenty of prawns)
  3. Slice the squid tubes into rings about 5mm wide.
  4. Poach the pork in the stock, remove, cool and slice into 2-3mm thick pieces.

Preparing the noodles:
  1. Put the fresh yellow noodles in a bowl and pour boiling water water. Stand for a minute and drain.
  2. Soak the dried rice vermicelli in hot water until softened (about 5-10min), drain and set aside.

Putting in all together:
  1. Heat 2-3 tablespoons of peanut oil in a wok, stir fry the remaining garlic until golden brown.
  2. Add the noodles and rice vermicelli and 1 cup of stock and stir fry over high heat for 1 -2 minutes.
  3. Add the bean sprouts, 3/4 of the pork, prawn and squid and another 1/2 cup of stock and stir fry for another minute until heated through.
  4. Make a small well in the middle of the noodles, pour the beaten egg in and let it cook briefly, until it starts to coagulate and then stir through the rest of the noodles.
  5. Add more stock if at any time if the the noodles look dry or threaten to stick to the wok.
  6. Transfer to large serving dish
  7. Garnish with reserved pork, prawns and squid and sprinkle sliced chilli and spring onions for added colour.
Enjoy!

November 12, 2010

Monkfish Medallions with New Season Potatoes and Asparagus


I was walking by my favourite fishmongers the other day and as I always do, stopped by to browse in their shop window. Sometimes they have pretty interesting stuff. I love to buy, prepare and eat freshly caught fish, and their fish is really fresh.

Being a Kiwi fish shop, they have items which might be considered unusual elsewhere - seasonal sea urchin roe - called kina by the Maori - and uni by the Japanese who make it into delicious sashimi and sushi. Occasionally they even have mutton birds - a curious sea bird which comes from the South Island which has been preserved in brine. They belong to a order of sea birds called petrels and perhaps the "mutton" part of their local name comes from early settlers who thought the meat reminded them of mutton. More information on this when I have actually cooked one.

This time, what caught my eye was a particularly ugly fish. It couldn't be, I thought, a whole monkfish? Sure looked like one. The guy in the shop said, it's a Stargazer - local name for Monkfish and happily filleted it for me. This whole fish about 40cm long cost the equivalent of 2 Big Mac meals and yielded 2 large fillets of firm white flesh and a frame to make super duper fish stock.

Thought I'd make a variation of a Rick Stein recipe.

Ingredients:
  • Monkfish fillets, cut into 1 inch thick medallions
  • 1/2 cup Roasted buckwheat
  • 1 clove fresh garlic
  • 1 bunch Fennel fronds
  • sea salt
  • white pepper
  • new season potatoes
  • asparagus

Method for the fish:
1. in food processor or mortar, crush up buckwheat with garlic, fennel and sea salt.
2. coat one side of the fish with this mixture
3. fry in olive oil, crumbed side down first, for about 2 min, then turn over and fry till just cooked and brown on the other.

For the veges:
Peel and cook the potatoes in a pot of well salted water, drain and keep warm
prepare and steam the asparagus (or blanch them in the same salted water for about 2 min)

To serve:
Plate the potatoes and asparagus with generous amount of butter or saffron mayonnaise
Place fish alongside..

Eat and enjoy!

November 7, 2010

Corn & Zucchini Fritters


Spring is here - or trying to establish a foothold in any case. We've had some really lovely warm days followed by a couple of blustery days with wind blowing right up from the Antarctic.

However, today is a beautiful day, the wind has died down, the sun is out and the birds are singing. And the grass needs mowing. Before getting onto that task, I thought I'd make myself a nice light, healthy lunch of corn & zucchini fritters. How can fritters be healthy, you may ask. Aren't they deep fried? Well, these are full of fiber and practically fat free too!

Ingredients:
2 cups fresh corn kernels
2 cups finely julienned zucchini (grated is OK)
1/2 cup feta cheese, crumbled
2 eggs
1 cup water
1 finely chopped red chilli
1/2 cup finely sliced spring onions
1 cup self raising flour
1/2 tsp ground cumin
salt and pepper to taste

1. In a large mixing bowl, combine flour, cumin and freshly ground black pepper. Add a bit of salt (depends on how salty your feta cheese is). Mix well.
2. Add the vegetables and cheese to the flour
3. Beat the eggs well
4. Add the eggs and water to flour and veg mixture and mix well. It will be a stiff batter.
5. Heat a non stick skillet (you can add some olive oil for frying but it is not necessary). Drop 1 large tablespoon of the fritter mixture on the the skillet and fry over medium-low heat for about 3min on each side, till well browned. You'll know when it is time to turn over when small bubbles appear on the surface.
6. Serve with sweet chilli sauce / chilli mayo / alioli

Makes 12 fritters.

October 8, 2010

a colourful diet


We've been encouraged to add colours to our diet. Websites, healthy living magazines... TV programmes... So I decided to make a salad (salads are healthy.. right?) and include the colours red, green, yellow and white. Let's look at each of the colours.

Red: fruits and veggies that are red have lycopenes (think tomatoes) or acanthocyanins. Lycopenes are thought to protect against several types of cancer, especially prostate cancer. Acanthocyanins on the other hand are found in red berries are powerful antioxidants. Beetroot, another beautifully red vegetable has a pigment called betanin which is a betalain pigment, which may also exhibit anticancer activity.

Yellow (and orange) fruits and vegetables are often coloured by natural pigments called carotenoids. Beta carotene in carrots, sweet potatoes and pumpkins are converted to Vitamin A by the body which is good for the eyes and the heart. Citrus fruits (although yellow or orange) are not a good source of Vitamin C but have plenty of Vitamin C, which is good for the immune system and if you eat the pulp, then, fibre as well.


Yellow / Green leafy vegetables are coloured by chlorophyll. They also contain lutein, which is good for prevention of macular degeneration in the eye as well as reducing the risk of cataracts. Good examples are spinach, green peas, mustard greens, avocado.


Dark Green - vegetables such as brocolli, cabbage, kale - cruciferous veges contain the chemicals sulforaphane and isocyanate and they also contain indoles, all of which help ward off cancer by inhibiting carcinogens.


White / Green : leeks, onions, garlic, chives. The onion family contains allicin, which has antitumour properties, other members contain antioxidants such as quercetin.


Now, that's quite a mouthful of information.
But most importantly, is to make this all palatable. (which is pretty easy), so here's a colourful tasty salad to perk anyone up during wet days that are Winter trying to become Spring.

Beetroot, Couscous and Feta Salad
Ingredients:

1 medium - large beetroot, boiled in its skin

1 cup couscous, rehydrated with hot water / vege stock and fluffed up

1 small lemon

1 cup feta cheese, cut into 1cm cubes

bunch of greens (we used miner's lettuce from our garden), rocket does very well

generous bunch coriander - roughly chopped
1-2 cloves garlic finely chopped
salt pepper
1/2 tsp cumin seeds, toasted and ground
drizzle of olive oil

Method:

1. peel and cut the cooked beetroot into small 1 cm cubes, keep warm

2. lemon: cut half into thin slivers and juice the remaining half - mix with beetroot
3. toss all ingredients together in large bowl - you can add as much olive oil / lemon juice as you like (I use less oil, just to reduce the calories)


Serve with toasted crusty bread, such as sourdough.

September 18, 2010

Chinese Radish Cake

Fried Lor Bak Go

Having eaten a rather poor version of "lor bak go" (chinese radish cake) recently at a chinese restaurant that I shall not name, I decided to re-create an old family favourite.

Obtaining the ingredients was not too difficult - there is a reasonably well stocked Asian supermarket about 45min drive away from home. Stepping into this grocery, one is greeted, no, almost assaulted with a heady aroma of dried shrimp, shitake mushrooms, rice, pickled vegetables - a visit to this treasure store of exotic foods always yields a basket full of goodies.

Ingredients for Lor Bak Go

Traditionally eaten during the Lunar New Year celebrations (at least by my family), Lor Bak Go is also a firm fixture on the dim sum menu of many Chinese Restaurants.


The difference between a bad lor bak go and a good one is like chalk and cheese. A bad one is almost always very stodgy, tasteless and has very little radish, much less chinese sausage, shitake mushrooms or shrimp. It also has the consistency of an eraser - rubbery.

Plain rice flour

A good one, on the other had, is light, flavourful and has plenty of shredded radish just about held together by rice flour, interspersed between the strands of radish will be nuggets of scrumptious chinese sausage (lup cheong), bits of fragrant shitake mushrooms and boldly flavoured dried shrimp. It can be eaten just fresh out of the steamer or cut into thick slices and pan fried. I just looooove the crisp brown edges of the fried version. Accompanied by a dollop of chilli jam and thick black soy sauce - absolutely scrumptious !!

So here's my take on Chinese Radish Cake:

Ingredients:
1 large chinese radish (daikon)
about 1kg 1.5 cups rice flour (approx 250g)*
6 dried shitake mushrooms
2 chinese sausages (lup cheong)
1/4 cup dried shrimp, chopped
1 tsp salt 2-3tsp light soy sauce
1 tsp white pepper 2 cups water
* this proportion of radish to flour (9:1) makes for a very soft but flavourful cake, a bit difficult to slice and fry. For a slightly firmer cake, add more flour but not more than 4:1.

Method:
1. Rinse and soak the shitake mushrooms.
2. Roughly chop the dried shrimp and cut the sausage into a fine dice. Do the same with the mushrooms once they are rehydrated. Reserve the mushroom water.
3. Grate the daikon (use the large grater - for better texture)
4. Heat oil in a large wok and fry the sausage till brown, then add the shrimp and mushrooms.
5. Add the radish and reserved mushroom water and cook over medium heat for about 5-10min, till the radish is cooked but al dente. Season with salt, pepper and soy sauce. It should not be too salty.
6. Mix the rice flour with about 1 cup of water.
7. Add the rice flour slurry to the hot radish mixture and stir till well mixed - the mixture will get increasing stiff - after about 5 min, turn the heat off.
8. Test fry a tablespoon in a small non stick frying pan. This is to make sure that the mixture is well seasoned and has the right proportions of water and flour. Add more flour or water as necessary to achieve your desired consistency.
9. Pour the mixture into well greased baking trays (this recipe makes 2 loaf tins) and steam for 1 hour.
10. Allow to cool before turning out. The
lor bak go can be eaten as is or cut into thick slices and pan fried. For slicing, better results are achieved if the cake is left to firm up overnight in the fridge.

Enjoy!

July 30, 2010

Gordon Ramsay is totally obnoxious and rude

I love food, I love watching food programs and I love watching programs where people travel and taste food of other cultures. But it was terrible watching Gordon Ramsay and the Great Escape where he went to different places in India, sampling Indian cuisine. He is so rude and obnoxious. He is definitely not open minded when it comes to trying and accepting Indian food. And I thought Zimmerman was bad, Ramsay is worse. Give me Anthony Bourdain anytime.

July 27, 2010

The girl with the dragon tattoo

The only time I watch movies is when I am on the plane. This means I don't watch movies very often because I don't fly that often compared to business people. But I did fly recently to Canada and on my flight back, I watched this Swedish movie titled The Girl with the Dragon Tattoo.

It was dubbed in English but that did not stop me from enjoying the movie. Good plot. I don't know about the version shown in the cinema but this version but uncensored. It is a movie for mature adults. I don't know if I will get to watch the other two episodes.

June 13, 2010

How to start a fire in the fireplace...

Winter is here again. This means cold, windy and/or rainy days. This also means having to light the fireplace. Now, I like to experiment with different ways of starting the fire. Criteria that I have given myself:
  • use only 1 fire starter
  • all firewood that I need for the few hours must be in the fireplace. Why? Because I do not like the idea of firewood in the house but not in the fireplace. That gives spiders and borers a chance to enter the house.
So here is 1 method I found to be fulfill those 2 criteria. What you need are:
  • 1 piece of non-toxic fire starter made from raw material
  • 3 pine cones
  • 3 kiln dried pine blocks
  • 3 pieces of macrocarpa or any well seasoned hardwood
First, place 1 piece of macrocarpa in the center of the fireplace as shown.


Then place the other 2 pieces of macrocarpa on the side, one on either side.


Place pine blocks, pine cones and fire starter as shown below. Ensure that macrocarpa, pine blocks, pine cones and fire starter are in contact with each other, one way or another.


Place the remaining pine blocks on the pine cones:


Light and wait for the warmth. Some times the pine cones may roll off. Therefore, try to place them so that they are "supported".


Depending on the size of the macrocarpa, this configuration would burn for 2-3 hours before I need to go out and collect more seasoned firewood. Keep warm!

May 14, 2010

Fried Green Tomatoes

Last tomatoes of summer

Sob! I looked sadly at the basket of green unripe tomatoes that we just harvested. Autumn is definetely here and with the change in temperature, our tomatoes are simply not ripening as they did a month ago. Rather than letting them rot when the rains come, we decided to make the most of them.

Green... green... everything and anything with a green theme:
1. Green tomato ketchup
2. Green tomato and Green Chilli Sauce (anyone who has been to Nepal knows this one)
3. Green tomato chutney
4. Fried Green Tomatoes

Green tomatoes are great for any of these recipes. They are firm, tart and have a lovely flavour quite unappreciated by many.

Fried Green tomatoes are a quintessential Southern side dish (or a fancy seasonal appetiser!)
Very easy to make - but it does leave a mess on the stove top - so I probably won't make this too often. The sharpness nicely cuts the grease from what is essentially a deep fried item.

Slice tomatoes into 5mm thick rounds


Coat with cornmeal and fry

Drain on kitchen paper

Simply slice the tomatoes into 5mm slices, sprinkle with salt and pepper, dip in egg, then cornmeal and fry till golden and crisp. Drain on kitchen paper. Enjoy!

May 10, 2010

Pizza Night

Thin Crust Zucchini Pizza


We've been here for more than a year now and have not found good authentic thin crust Italian pizza. Now that most of the unpacking has been done and our pizza stone unearthed, we decided to give it a go. (also that we've just purchased a pizza peel as we weren't sure if MAF would've allowed our old wooden one into this country). Anyway, tried we did and the results were rather good. Browsing through our books we found a copy of an easy and good recipe for pizza base (adapted from Jamie Oliver, thanks to Food Network). The pizza sauce, we were rather proud of, was a passata made from ripe red Tommy Toes from our own vege garden, as were the zucchini and basil. Yum. Nothing better than really fresh fruit and veg.

Kneading dough
Pizza Base:
7 cups bread flour
1 tsp fine sea salt
2 (1/4 oz) sachets dried yeast
1 tablespoon sugar
4 tablespoons extra virgin olive oil
2.5 cups luke-warm water


Sift the flour and salt onto a clean work surface or large metal bowl and make a well in the middle.
In a measuring cup, mix yeast, sugar, olive oil and warm water and leave for 10min to activate the yeast.
Pour into the well
Mix with fingers, gradually working flour in from the sides.
Knead till smooth, about 10min

Dough rising in bowl

Place in lightly greased bowl, turn over once to coat and cover top of bowl with damp towel or cling film and leave in warm place to double its size, (about 1h)
Punch dough down, divide into 8 portions (8 pizzas).
If you don't want to make so many pizzas, just pinch off what you need and place the rest into a ziplock and freeze till required.


Pizza Sauce / Tomato passata:
  • Ripe tomatoes
  • Garlic (to taste)
  • fresh basil (to taste)
  • salt
Roughly chop tomatoes.
Heat olive oil in saucepan, lightly saute garlic.
Add tomatoes, cook till soft, add a bunch of basil leaves, simmer for 5min.
Pass tomatoes through sieve.
Reduce sauce till desired consistency, add salt to taste.

Thin Crust Mushroom Pizza


Pizza toppings:
Anything you like - zucchini, mushrooms, we used our own hand made mozzarella :)

Pizza stone (removed from oven to illustrate proper placement) with pizza on top

Assembling and cooking:
Place pizza stone in middle shelf in oven.
Preheat at least 30min (1hour is better) to at least 200C (real Italian pizza ovens are heated in the range of 300C).


Rolled out pizza dough

Roll out the dough as thin as desired (tossing is a bit tricky and messes up the kitchen)
Transfer onto a pizza peel liberally coated with flour or cornmeal (the flour / cornmeal acts as a slippery base so that the pizza slips off the peel onto the stone)
Spread passata onto the base - you can also use pesto for a non tomato base
Add toppings - don't overload as it will be difficult to deliver the pizza successfully
Open oven door, place peel right over the stone and with a swift motion pull it back so that pizza is now on the stone. This may require a bit of practice. Quickly close door so as not to lose too much heat.
Bake for 5-10min
In the meantime, prepare another pizza (it works better if you have 2 peels)
Removing the pizza from the ovens is just reversing the steps for placing it in.

Enjoy!

Autumn sunshine

It's my day off and having the luxury of rising later, I lazed in bed for a while watching the shards of light slicing through the venetian blinds and piercing the curtains of the bedroom. Such sights fill me with excitement as it promises warmth and light for the day.
Getting out of bed, flinging wide the curtains and drawing the blinds brings a delicious warmth into the house and makes one feel wonderfully alive.
I'm excited; today's chores do not seem onerous, partly because some of them are in preparation for a long anticipated journey, a pilgrimage to Santiago de Compostela. In fact, I should stop now and get on with them.

April 24, 2010

Triple X Hut/Sunrise Hut weekend stay

"So when are we going to tramp together?" Andy asked over dinner some time in March. "Let's do it in April!" So tramp in April we did. New Zealanders call it "tramping", I grew up calling it "trekking" but we all mean the same thing - fun.

Opening one of the gates on the farm

Triple X car park is located on a private farm. In order to access it, one needs to open 3 gates. Do make sure to close it because this is a private, working farm with sheep running freely. Be respectful, be responsible.

Triple X Hut

A 10 minutes walk from the car park is Triple X hut. A small hut with a wood stove. It has two rooms and each room can sleep up to 8 people. Compared to Sunrise Hut, this is basic...and cold.

Bed bunks in Triple X hut

The next day, we trekked up to Sunrise Hut. It takes an average of 2.5-3 hours to reach the hut, if you walk at a speed of 3.5-4 kmh. There's lots of flora and fauna on the way up.

By the way, you need to purchase hut tickets from the Department of Conservation if you want to stay in these huts.


Enjoying the sun outside Sunrise Hut

View from bed bunk in Sunrise Hut

A short walk from Sunrise Hut is the Armstrong Saddle. We took a stroll to the saddle after lunch. It was very windy and the ridge is moderately exposed.

The ridge walk to Armstrong Saddle

At Armstrong Saddle, there is a description of the history Triple X Hut and the saddle.

Armstrong Saddle

Armstrong Saddle was named after Hamish Armstrong, whose plane crashed on this saddle. Rescuers found the wreckage and a size XXX shirt. Hence, the name Triple X hut. However, Hamish Armstrong was not found. Maybe he did not want to be found...

Sunrise from Sunrise Hut

March 2, 2010

Chinese New Year in New Zealand

Yu Sheng (Raw Fish Salad)

This is the first year we are away from home during Chinese New Year (CNY) celebrations. So how did we celebrated CNY in New Zealand? It was a quiet affair for us since we do not have any family in Wanganui, and CNY is not a public holiday here.

If we had been in Auckland, which has a large number of ethnic Chinese, there would be more to do. I did an internet search and found that Auckland has a lantern festival to mark the occasion, lion dances etc. Given the numerous Chinese supermarkets and restaurants up in the City of Sails, buying traditional goodies and eating festive foods would have been relatively easy. Not so where we are... so we had to make do.

Tradition calls for a reunion dinner on the eve of the Lunar New Year when everyone one returns to their family. In China and where-ever there is a large ethnic Chinese population, there would be an exodus of people in the days leading up to the New Year. The tables would be laden with festive dishes with auspicious names such as Guaranteed Abundance (Bao Yu or abalone), Good Fortune and Wealth (Ho See Fatt Choy - a dish made up of braised dried oysters and black fungus). There must be so much food that leftovers are guaranteed. To have insufficient food would be inauspicious. Since I had pretty busy work schedule right up to the eve, I was pretty tired by Saturday, Feb 13th. To compound it, we had signed up for a Cheese making course at the Community Education Services locally and it was a full day’s affair on Saturday (CNY eve), which meant we did not have time or energy to cook up traditional goodies. That evening, we just had our own reunion dinner with a good piece of porterhouse steak and a simple salad with fresh veggies from our garden. On Chinese New Year’s day, we had a wonderful time Skype-ing with all the family back in SG and we ate crunchy snacks, drank a delicious chilled white wine to accompany a tasty Insalata Caprese made with Mozarella from the Cheese School. Too bad we missed out on "ang pows" (little red envelopes with money) by not being able to visit family.

Yu Sheng (raw fish) is one of those festive dishes that seem to turn up in every chinese restaurant in Singapore during CNY. Since we had been invited to a BBQ that evening, we said we would bring a salad. Our Kiwi friends (bless them) knew it was CNY and thought it would be a good idea to help us celebrate! Moreover they were intrigued by the idea of a communal salad toss up. That afternoon, we put together a home made “yu sheng”, using carrots, cucumber, red peppers (instead of yam strips), cabbage (instead of daikon) and topped it with crispy noodles and Cheezels (the cheezels looking like old fashioned gold coins). Smoked Salmon was used as the "raw fish". Little zip locs of pepper, five spice powder, crushed peanuts, plum sauce and peanut oil completed the portable feast. We brought this colourful platter to our Kiwi friend’s house.

The toppings were then sprinkled onto the salad after each item was introduced with auspicious sayings. Everyone had a great time tossing the salad, shouting greetings and wishes for good health, wealth and fortune. It was done with such enthusiasm that we were in danger of losing the salad onto the floor!


Tossing Yu Sheng

The Lo Hei Yu Sheng Ritual, (as far as I can gather from the Internet):
Step 1: All gather at the table, offer New Year Greetings.
Words: Gong Xi Fa Cai (Congratulations for your wealth) or Wan Shi Ru Yi (May all your wishes be fulfilled)

Step 2: Raw Fish (in our case, cold smoked salmon) symbolising abundance is added
Words: Nian nian you yu ( may every year have abundance)

Step 3: Pomelo (or ruby grapefruit segments for us) is added, with the words: Da ji da Li (not sure what this means)

Step 4: Pepper and Five Spice powder are sprinkled over: Words Zhao Cai Jin Bao

Step 5: Peanut oil is poured out circling the ingredients (to increase profits and encouraging money to flow in from all directions)

Step 6: Chopped peanuts are sprinkled over symbolising gold and silver in the house

Step 7: Sesame seeds, representing flourishing business is also sprinkled over.

Step 8: Crispy noodles (and Cheezels in our case) are then added with wishes that literally the whole floor be covered with gold.

Step 9: Everyone tosses the salad with chopsticks shouting new year greetings and wishes for good health, striking lottery, good health, promotion or whatever else seems desirable and good.


An Abundance of Good Food

The BBQ dinner was a feast, the dinner table groaning with an abundance of food. Everyone had a wonderful evening - laughing, eating (too much), enjoying a good chat and each other's company. So if you asked me how it compared with celebrations in Singapore? As someone has so aptly put it - same same but different la.. Gong Xi Fa Cai everyone!

February 9, 2010

Preserving the harvest


Tomatoes galore

Now that summer is in full swing, there is fruit aplenty and sometimes, an overabundance even. Rather than forcing oneself to eat yet another tomato fresh from the garden or letting fruit rot on the vine, the best alternative is to preserve the harvest.

In our eagerness to have fresh tomatoes, we had planted 8 plants, including several heirloom varieties, and beginner's luck would have it that all are producing more than we can eat. In case you are wondering - we have Black Krim, Purple Cherokee, Golden Nugget, Tommy Toe, Green Zebra, Red Roma and 2 heirloom ones, which we cant remember the name of.


Tomatoes and Apricots, all chopped up, ready to cook


Anyhow, we get about 250 - 500g of tomatoes everyday, that plus some apricots from the supermarket that refused to ripen (never buy stone fruit from supermarkets if you can help it) made me decide on cooking up a chutney.

The recipe is really simple, and you can add any fruit to the tomatoes - cooking apples, add body and texture, sliced onions do the same. Sultanas or raisins add some sweetness - anything goes really. The aim is to get a mixture of sweet, tart, spicy and slighty salty flavours that will slowly blend together as the chutney matures.


Aromatics


So here's the recipe:

Tomato - Apricot Chutney
  • 0.5kg fresh tomatoes, roughly chopped
  • 0.5kg fresh apricots
  • 2 large onions finely sliced
  • 4 cloves garlic
  • 4 cardamom pods, peeled
  • 1/2 tsp paprika
  • 1/2 tsp ground ginger
  • 1 tsp yellow mustard seeds
  • 2 tsp salt
  • 250g brown sugar
  • 150ml malt vinegar

Put all ingredients into a non-reactive pot, bring to the boil, let simmer with low heat for about 30min or till fruit and onions are soft, stirring occasionally to prevent mixture from catching. Taste and season if neccesary. Meanwhile, prepare jars for bottling.
Once mixture is ready, bring rapidly to a boil (a.k.a. jam making) for 5min till silky and jammy.
Bottle while hot.


Chutney simmering away


The chutney may be eaten fresh but letting it mature in a cool, dark place for a week or 2 is better. (some things are better when aged a bit...)


Chutney bottled, ready for maturing


This chutney goes well with cold meats, especially pork and chicken and will do well as a sweet but tangy glaze for a ham. Enjoy!


January 31, 2010

Back to the Mountains... at last

Ruapehu emerging from clouds

Established in 1887, Tongariro was the first national park in New Zealand and the fourth in the world. It is also a dual World Heritage area, a status which recognises the park's important Maori cultural and spiritual associations as well as its outstanding volcanic features.

The Park is only 2h away from where we are and now that we have learnt to drive longer distances, visiting this wonderful playground over a weekend is very do-able. The drive itself is very scenic, twisting and turning along SH4, often referred to as the "Para paras".

One of the big reasons for relocating to New Zealand is the wonderful hiking opportunities that exist here. Now that our house is more or less settled, what better way to start our hiking adventures than ticking off what has been described as one of “the best day walks in the world”


do not underestimate mountain weather

Many people underestimate the nature of mountains. Sometimes, due to the accesibility of this tramp, people may get into all sorts of trouble. We had made a booking for a shuttle bus run by Discovery Lodge. However, the day that we had wanted to make the Crossing, the shuttle was cancelled, due to bad weather. The owner-operator Callum Harland - an experienced mountain runner who appreciates the change-able nature of mountain weather and operates the bus only when it is safe. The Discovery Lodge runs the earliest shuttle (0545h) to the start, allowing hikers to enjoy the "wilderness experience" before the "hordes" arrive. (Most other operators arrive at the start between 0730h and 0830h) The pre-dawn start also gives plenty of time to take in the fantastic views and complete the crossing before the day gets too hot. They also have a wonderful pick-up schedule starting from 1230h and hourly thereafter till 1630h, which means that if one is fast, or the weather bad, you can complete the hike quickly, get down and back to warm hot showers or if the weather is good, take your time and snap endless photos, bag the peaks of Tongariro and Ngauruhoe and not worry about missing your pick-up.

When we arrived in National Park the day before, it had been raining badly the past few days and the mountains were completely covered in cloud. The weather report for the next day suggested a small break in the weather and we jumped at it. Waking up early to catch the 0540h shuttle reminded me of midnight alpine starts and I was happy to get back into this mode.

an early start
The track from Mangatepopo Car Park to Soda Springs is flat, well formed and easily covered in an hour. It was very pleasant stretching the legs on this section, stopping at Soda Springs for a toilet stop (no more toilets till Ketetahi hut!!) and a quick drink of water before making the ascent to the Crater rim.

I had visions of hard work on scree (memories of the infamous Caneleta on Aconcagua), but the new track which zig zags its way up was really easy underfoot, steps well formed and it kind of took the excitement out. Almost a walk in the park. We hurried along as the clouds were creeping up the mountain and unfortunately, we were beaten to the South Crater by the weather.


view down to Soda Springs, clouds moving in

With thick cloud and the possibility of rain, we decided against climbing to the summit of Ngauruhoe and after a snack, walked briskly across South Crater, trying to imagine the views!


South Crater in the mist

Reaching the far end of the South Crater, we climbed up to Red Crater, again, not too steep, but the rocks and clay were somewhat slick from the mist and care had to be taken.

Red Crater rim, rocks, slick from mist

Just as we topped Red Crater, rim, the highest point of the Crossing, the clouds parted briefly and we were treated to a magnificent view of the Emerald lakes.


Emerald Lakes emerging from mist

Descending to the Emerald Lakes needs a little care, as the path is on loose scree and the ridge is moderately exposed. In high winds and poor visibility, one could potentially be blown off. This probably is the only location with some objective danger on the crossing, assuming one does not attempt the summits of Ngauruhoe and Tongariro.

descent from Red Crater, note sulphur stains

At this juncture, we noted sulphurous smells and saw numerous steam vents on the side of the crater, many with sulphur deposits around them. It was a reminder that the area is still very much a geothermal area and volcanoes here are by no means extinct.

Once we had gotten down to the Lakes and were about to explore their shores, the wind picked up and clouds came in again, this time with rain and this rain followed us all the way down to Ketetahi Car Park.

Blue Lake in the rain

So, looks like we'll have to go back, sometime soon to re-visit the area in good weather, bag the summits and take in the views (and snap a few pictures!!)